Wednesday, September 29, 2010

Pumpkin Butter - First Attempt

One of the things that I used to really love about fall in central Illinois was the trips to the local apple orchard. When we were there, we would always pick up jars of their apple butter as well as a jar or two of pumpkin butter. For a birthday gift for Dan one year I even had it shipped out here for him - a much too expensive solution for our long term pumpkin butter needs. I decided to try my hand at it this year. Since it was a spur of the moment decision, I used canned pumpkin rather than doing it from scratch. From scratch is definitely a future goal.

I guesstimated out how much of the spices and sugar to use. In the end, it was not enough for our liking. Once I have the recipe down, I will share it with you all. I think that more sugar would have made this batch much better. As it was, the pumpkin flavor was good but not sweet enough for a butter. The cloves and cinnamon amounts seemed correct but having to use powdered ginger over fresh was also a big disadvantage. I am also contemplating replacing the fresh ground nutmeg with some mace to kick up the nutmeg flavor in the butter.

I mixed all the ingredients and put them into the mini-slow cooker that came with our big one. This mini slow cooker has always done a good job of keeping appetizers warm for parties, but would it actually cook down the pumpkin into a butter? We plugged it in after dinner, and I wondered how many hours it was going to take. The recipe I was working off of made it sound like this would take several hours - around 10 or so. I was wondering if this was just too long of a time or not, so I placed the lid with a vent on the mini cooker and watched a movie coming back to the pot to stir every now and then.

The mini slow cooker worked very well, actually too well. Too much of the liquid cooked off for our liking after only five hours. It made for an extremely pasty butter. I was slightly disappointed in the results and wished I would have watched the cooking better than I had. It also tasted good, but it was not an exact match for the one I was trying to mimic. A tasty first try to be sure but not the last try. I suspect that I will be making more of this during the fall and winter months.

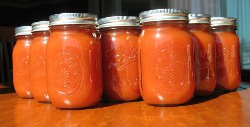
From one can of pumpkin, I got two half pints of my butter experiment. Now I know that there are differing opinions as to water bath canning versus pressure canning, vs freezing of pumpkin purees. I decided on just freezing mine. I am very much a safer than sorry kind of person and tend to want to follow the guidelines on this kind of thing. One of the reasons they recommend only freezing pumpkin is the viscosity of the puree makes it hard for the heat to fully penetrate the jars, and with how thick this butter turned out, I believe them. Another thing that I have read is that pumpkins have a very inconsistent pH level and therefore it is hard to pin down processing times. Who knows? I not being a food scientist have decided to err on the side of caution and just freeze it.

Hopefully more experimentation will result in a recipe I like enough to share. Till then, let me know if you have any killer pumpkin butter recipes you think I should try.

Monday, September 27, 2010

Raspberry Jam - Hot and Not

One of my favorite things about going to my Uncle Glen and Aunt Chris' house when I was a kid was the raspberry bushes. Uncle Glen hosted a huge garden for the entire family on his farm, and many weekends out of the summer were spent there picking beans, sweet corn, beets, potatoes, zucchini, carrots, and apples. My favorite things, besides the gigantic pumpkins he grew for Halloween, were the raspberry bushes.

Boy do I miss those free berries! I splurged this year and decided to make some seedless raspberry jam for this year. There were raspberries on sale at the store, and I also picked up some more at the end of the day at the Farmer's market on Sunday. I washed the berries in small batches and then put them into a pot. I then heated them through and mashed them down with a potato masher. This made a raspberry slurry that exposed just how many seeds there were.

From there, I took a fine mesh sieve and pushed the raspberry puree through. This was a super time intensive but easy to do task. I was surprised that when I dumped the filtered juice and pulp into the pot for the cook up of the jam there were still some seeds present. They were super small, so I am not sure if they just happened to fit through the mesh or if I was a bit sloppy at some point and lost some seeds into the filtered juice.

I ended up with four cups of juice. I added three cups of sugar and the juice of a lemon to preserve the color of the raspberries into the cooking pot. I learned when doing this jam that it reached a solid jam state two degrees sooner than my usual jams. I am wondering if I would have pulled the cherry earlier if it would have turned out. Perhaps I just cooked that jam too much which turned it into the odd texture it is.

I ended up with three jars of jam. I put crushed red pepper into one of the jars to make a spicy and hot version of the jam. It is great for an appetizer when poured over warmed brie, baked under pastry with brie, or poured over warmed cream cheese and served with crackers. I hope that one jar of it is enough for this year. Two of the jars are plain jam, but one is going off to a friend. That leaves me one highly prized jar for myself. I am thinking about trying a recipe out of one of my canning recipe books that cuts the raspberries with apples to stretch the jam out into a bigger batch without using more berries. It sounds like an intriguing way to make this without the high cost. Things to ponder for next year, till then, I will be hiding this jar away, so I don't open it until I really need a pick me up.

Friday, September 24, 2010

Final Peaches of Summer

With the final days of summer over, I thought I would post up the last of the peach canning I did before my sister came to visit last week. The peaches still seem to be going strong here, and while I am a bit sick of eating peaches, I know that when the winter dreariness sets in I will be glad I did all this work while they were plentiful. I tried out two new recipes this yeah for the winter months.

One of the things I did was peach pie filling. Peach pie is not Dan's favorite, but I need a change from his favorites, apple and cherry, once in a while. I did three small pints of the filling. My canning books did not have a recipe for straight up peach. Most of them called for a peach and apple blend, but I wanted a peach only pie. I decided to follow the general way that the apple filling was made. One of the disadvantages of this was the lack of liquid for a starter for making the filling. With the apple pie filling, you used natural apple juice. I decided to macerate the peaches with the sugar the recipe called for and then use the juice from this as the starter. This was an okay way of doing it, although it was rather messy to fish out the peach slices from the liquid for the cooking step with the Clear-jel. Once I try out the filling, I will let you know how it all went.

Speaking of updates, a small one on the Gravenstein pie filling. It was really too nutmeg heavy when I made the pie out of the remnants from the canning pot, but when I made this last pie, it had mellowed substantially. I think I will keep that recipe as is, however I think I will choose an apple more suited for high heat cooking as the Gravensteins got very mushy for my liking.

I also made the Zesty Peach BBQ sauce out of The Ball Complete Book of Home Preserving. I have a feeling that the five jars I made are not going to be enough for the year. I love this recipe, but I ended up tweaking it a bit in terms of heat and texture. It seems like it will be great on grilled shrimp skewers and also as a dipping sauce for this winter's fondue dinners. I already have people wanting jars of it just from my description of it to them. Sweet, spicy, and just the right amount of vinegar. Yum!

Well I am off for the Friday market. I want to get more grapes for raisins and hopefully more cucumbers for late season pickles. There are just a few more items on my canning list, and then it will be time for the Christmas crafting! Oh my! I cannot believe how fast time has moved this year. It seems like I was just writing my holiday wrap up from last year. Well off for the market.

Thursday, September 23, 2010

First Day of Fall

I thought I should usher in the first night of fall with an apple pie, so yesterday afternoon, I grabbed one of the jars of Gravenstein pie filling from August and went to work. I made up some pie crust quickly and chilled it while I got some housework done. From there it was as easy as pie! ;) I rolled out the dough, popped open the jar, filled the shell, topped it off, egg washed the top, cut the vents, and added some rough sugar. I thought it looked just as good as a professional pie and tasted wonderful.

Last weekend, while my sister was visiting, I found some Concord grapes at the Friday farmer's market. They were super huge in size and very juicy. I picked up five pounds, so I could make both jam as well as some juice for later this year. It was interesting seeing people taste them at the market. Some knew what they were and expected their tart and sour taste. Others thought they were some kind of black sweet table grape. They were the fun ones to watch as their lips puckered up and comments of dislike followed.

I love these grapes for jelly. Here I have placed three pounds of stemmed, rinsed grapes and a half cup of water into the big stock pot. This mixture is brought up to a boil and then reduced to a simmer for ten minutes. During this time, I use my spoon to separate the skins and their flesh. This results in the green "grapes" that you see in the picture and the purple skins tend to sink to the bottom during this. When they sink, it is easier to see which grapes still need to be separated, so go after those next.

Once the mixture has simmered for the ten minutes, it should look something like this, a bright royal purple mess. There will be skins, seeds, and some still solid pulp. All of this will go into your jelly bag or jelly strainer. I let it strain for two hours, but there was still quite a bit of juice left. I stirred the pulp down in the bag for a while until all the juice was removed from the skins and uncooked pulp.

I measured out the juice and had the four cups that I needed. My Mom's old Ball Blue book is almost always right about the weight to juice conversion as it was here. I added the three cups of sugar to the juice and started my boil. I have read in some places that it would help to let the grape juice set overnight to be able to remove the solids that contribute to crystals that can form in the jelly. I skipped this step and did not see any form when the jelly was finished. To make the jelly, cook the juice and sugar mixture to the jellying point, or eight degrees above the boiling point of water.

This jelly did not have any foam form as well, so I got four good jars of foam free grape jelly. I was rather pleased. If you find foam on your jelly, skim it off quickly and start to fill your hot, sterilized jars. Fill to a quarter inch of headspace. From there take the jars and place them into your water bath, and process the jars for 15 minutes. Once the process time is over, remove the lid from the canner, turn off the heat, and wait five minutes before removing the jars of jelly.

I finished with four jars of the darkest grape jelly. It is a beautiful purple black. I like that we now have the final store bought jam out of the house. Grape is Dan's favorite, and I had not been able to find the grapes until this year. Now, with the smaller jars, we can hopefully finish the jelly before it goes bad in the fridge. Somehow, with homemade jelly, I do not see finishing them up as a problem.

I also made some grape jelly in the way my mom made it. In the hot, sterilized quart jars, add a half cup of sugar and one cup of grapes. Then, fill the jars with boiling hot water. I did find this to cause some problems. I am not sure if my mother used less sugar or if I just did not have the water fully boiling before adding it to the jars, but my jars had some residual sugar at the bottom of the jars when filled and also after the processing time.

I think the next time I make the grape juice, I will add the sugar to the pot of boiling water and make sure it is all dissolved before adding the liquid to the jars. This will prevent the crystallized sugar from forming at the bottom of the jars like it did this time. I cannot wait for this to finally be ready. This is one of those tastes of my childhood that I miss the most. I hope that I got the sugar to grape ratio correct. I am banking on the thought that my Mom did not use the full cup of sugar that the book says you can use.

Here are the jars after just a few days. It takes a few weeks for the juice to fully be extracted from the grapes that are canned inside of the jars. Once the juice is finally dark in color, it is time to enjoy. My Mom would crack the lids open and use them to strain out the juice from the spent grape pulp and seeds. I can barely wait to see if the juice is the same. I hope it is!

Tuesday, September 14, 2010

Pickles and Plums

The week before the steam show was not all tomatoes and savory, I did sneak in a jam for my sweet tooth. I love plum jam, and while I like red plum jam a bit better than white plum, this mixed batch turned out quite well. With the plums being $0.75 a pound, it also helps me to overlook the fact that the red plums were in the minority in this batch. I keep the peels on the plums because I like the candied feeling they give to the jam. The plums were also really juicy, so the need to macerate them for a while just did not need to happen. It helped me get much more done in a short time since I did not have much time to spare.

I did let them sit for a bit in the stock pot with the sugar to let some of the juices start to flow before I started the cook. This jam cooked up quickly, and I wished I had made a larger batch. I did temper this desire with a trip to the pantry to look over the large number of other jams that I made this year and to ask myself seriously if I would be able to eat them all this year. My answer was no, and my plan to make a second batch of plum dissolved as quickly as it solidified in my mind.

I ended up with four beautiful jars of jam. I really love the color of purple that this combination of different varieties of plums gave to the jam. I also like the size that I cut the pieces this year versus the last year. The peel pieces last year, while wonderful texture and super candied pieces of tastiness, they were just too big. The peels could become almost distracting to the rest of the jam, so this year's smaller pieces will be better I think. I will have to see when a jar finally gets cracked open.

I also made some pickles on the day that we left for the show. It was a final canning project that I could fit in the morning before our red eye flight to Iowa. I wanted to make several types of pickles this year, so that if I did not like one type I would not be stuck with lots of jars of them for the year. I decided to make a half order of a recipe from a family friend as well as a refrigerator pickle recipe that I hoped would be a good impostor for Dan's favorite commercial pickles.

The pickling cucumbers that I bought were also a great steal at $0.75 a pound. Needless to say I got some great deals that week at the Farmer's Market. For the hot processed pickles, I had to brine them for three hours with sliced onions. While the Pickle Crisp I bought said this was unnecessary, I was worried that if I did not brine the pickles that it would be missing the key ingredient of salt in the pickles. I made sure that the cucumbers and onions did not float to the top of the liquid by weighing them down with an inverted plate. As years of pickling experts will tell you, this is the perfect technique to make sure things stay where you want them to when soaking them.

I then made up the storing brine for these pickles. It was rather simple, using white sugar, white vinegar, mustard seed, and celery seeds. After simmering that up for a bit, the cucumbers and onions went into the pot to get warmed over before going into the hot jars. For once I was able to pack the jars correctly on the first try so that things were not floating all the way to the top with all sorts of liquid looking lonely at the bottom.

Next, I made up the brine for the refrigerator pickles. I did these as spears, so they would be just like the store bought version. I made up my own version of a pickling spice mix for this. It turned out rather well, and then I threw that into the vinegar, sugar, and added the specific spices to the jar that the recipe needed. The biggest thing was the garlic. We like garlic flavors, so I chopped up a bunch for the two jars. I tasted these earlier this week, and I really like them. While they are not the exact same as the store pickles, I really like them on their own.

Monday, September 13, 2010

Tomato Sauce

This year I took my first stab at making my own tomato sauce. I was hoping to get this done before we left for the Labor Day trip. It seemed like a really easy process, and overall it was rather easy. It is just very time consuming in the sense that there are lots of pots that are in need of watching and occasionally stirring. The nice thing about making tomato sauce... no peeling! Peeling is not that bad of a job, but the ability to just slice the tomatoes into four sections and throw them into the pot was a great ease in the labor time for this. I started out with around 25 pounds of Roma tomatoes at the beginning.

Once all the tomatoes were sliced up, I placed them into the pot until it could not hold any more. I cooked and mashed them as much as I could, but overall it was a waiting game for them to cook down. Then, I started a second pot. As the tomato slices would cook down in the first, big stock pot, I would add some of the warmed through slices from the small pot behind the big one. Once things were in a good state of cooking down, I ran out of room in the big pot again. From there, I stated ladling out some of the cooked tomatoes into the food mill and then added some from the back pot to the front. It was really quite efficient way to cook that many tomatoes all at once. The next problem I ran into was the largest bowl in the house filling with too much tomato pulp and still having more tomatoes to run through the mill. I ended up having to pour the cooked unprocessed tomatoes into another bowl, washing out the stock pot, and then adding the milled tomato pulp to that pot.

This all seemed to be a good idea until I ran out of room in the stock pot as well. So, I ended up starting the cook down process of the tomato pulp into a nice thick sauce. As space would be made in the pot, I would add more of the milled tomato pulp to replenish the stock pot until it was all finally in there. Then, the long but thoroughly easy job of a slow simmer until the right thickness was reached on the tomato sauce took up most of the night. I ended up starting this process around three in the afternoon and ended around midnight with the cans all popping closed.

In the end, I had nine full pints of tomato sauce. I am really excited to get to try this sometime soon. It is a nice thick sauce that will lend itself well to making pasta sauces or pizza sauce. I did not place any spices or herbs into the sauce, so I can tailor it each time I want to use it for something. Now I can use the sauce for cooking in the slow cooker or making up a quick marinara or even better making a from scratch pizza.

After working with 45 pounds of tomatoes, I was glad to be done with them. I know there are many out there who did more pounds of tomatoes, and my hat is off to you. 45 pounds for the two of us seems like it is going to be more than enough to keep us in the tomato products for the year.

Today I start some more canning. Hopefully the blog can catch up with my current canning soon.

Thursday, September 9, 2010

Tomatoes in Jars

It looked a little like a tomato stampede when I started unpacking the bags of tomatoes in the kitchen. They were piled up on counters and even took over the top most counter top. I did, however can this batch as whole tomatoes only. It took another trip buying just as many to get to the sauce portion of the canning. These went whole into jars. I only took a few jars last year during my canning with Annie and ran out faster than I thought I would. This year, being solo, I had to make a decision as to how many cans to make up. At first, I thought about doing around five maximum, but I quickly changed my mind when I thought about Dan's homemade chili and other yummy slow cooker recipes I like to make in the fall and winter when I get busy with crafting, tutoring, and dance studio things.

All the tomatoes had to be peeled, and this year the boiling water bath worked for all but two tomatoes. Out of 10 pounds of tomatoes, I would say that two not peeling easily was true luck. I think part of the success with peeling this year was due to me not over crowding the pot with too many tomatoes. Last year when it was the two of us working, we filled the pot up pretty full with tomatoes. I was, however concerned as I ran out of ice for the water bath. It took a lot of water changes, but the tomatoes did cool down eventually. The longer time they had heated up may have also contributed to the faster peeling since I have a tendency to pull things earlier than I should.

After peeling, it was time to core them out. Dan helped out a bit with this step. I think he felt a little bad for me working with this volume of tomatoes alone. It was nice to have a helping hand get me through this stage faster than the previous ones. The process became more streamlined and assembly machine like at this point. I would peel and set down on the cutting board, he would core them, and then the prepared tomatoes would go into the bowl. I was happy to see that the tomatoes were not just red skinned but also had nice red flesh through out the whole tomato. Nothing is worse than a ripe looking tomato that turns out to be tasteless and pink in the middle.

Next the tomatoes went into the canning kettle with water for their boil. I am wondering if I just don't boil them enough the first time, if I am bad at packing jars, or if I just do not pour off enough liquid the first time when packing the jars because this year I had tomato float again. It was rather frustrating. It caused me to actually lose sleep and begin to ponder if I have a canning perfection problem.

I ended up getting up the next day to open up all the cans, repacking, and reprocessing them all. My 12 cans went down to the eight you see here. Now they are nicely packed as I want them to look, but the tomatoes may end up being more stewed rather than whole tomatoes as I did two heat processes on them. As always, I did add the extra lemon juice to make sure there was enough acid in the tomato jars to make them safe for water bath canning. Hopefully eight will be enough. ;) For now I am off to sneak more boxes of cans into the house. Then it is off to 826 for tutoring and the dance studio. When will crafting get done around here again? Not till canning season is over I suppose.

Wednesday, September 8, 2010

The Start of Tomatoes - Salsa

During last week's canning madness, tomatoes went on super sale at one of the local markets. I could not resist; they were Romas. I went into full tomato canning mode. I decided it was time to make salsa. Now some of you may be scratching your heads looking at this ingredients picture as there are no tomatoes in this one. Well that is because I also wanted to try my hand at peach salsa this year as well. I cut up all the ingredients that both salsas shared in the morning and then cooked them up that afternoon. I made one critical error however.

After cutting up all the peppers, onion, and garlic, I peeled the peaches and started to notice my hands were tingling a bit. I decided to ignore this and start cooking up the peach salsa. My hands seemed to be on fire, but I just thought it was the overly hot day and the hot items on the stove. I gave it no thought as I stirred away and then put the very pretty peach salsa in the jars. I loved the way the colors all complimented each other in this salsa. It looked pretty and while I did not taste test it, the salsa also looked mighty tasty.

The burning started to get worse as I was working on cleaning up from this batch of salsa to prepare for the other one. By this time two hours had passed from the cutting of ingredients to now, and as I washed off the pots and canning equipment, the burning got worse. It was then that I realized the error of my ways. I had cut all the jalapeno peppers with no gloves on... all six of them. Now it is a big joke around the house and family as to my whimpiness when it comes to spicy food, but at this point I was in full on pain. I was having an allergic reaction to the capsaicin in the peppers.

Now some of you may be wondering why this did not happen last year, and I was doing this too as I was trying to wash off my hands as well as I could. Then it dawned on me that my wonderful husband had cut them last year and had a similar, all be it less crazy, reaction to the capsaicin. After much soap and water, nothing was improving. I turned my attention to milk. I rinsed and soaked my hands in milk. All seemed to be fine. We left to go out to the Eat Real fest for lunch.

Once in the fest, I thought all was okay. I figured that at this point the burning was just part of my mind thinking it was still burning. I hoped that the distractions of the food and festivities would make it all go away as it was just in my mind after all. Wrong! Dead wrong. The burning came back with a vengeance. My hands started to swell and turn purple. It was time for some serious intervention. We returned home quickly and moved up in butter fat, from skim milk to half and half!

After repeated dunks into the half and half interspersed with alcohol scrubbing, my hands finally were free of the burn. It was a six hour odyssey of skin numbing pain, but it was finally over. I vowed to only use the food processor or rubber gloves from here on out when touching any spicy peppers. It was then time to cook up the tomato salsa. I slipped the skins off the tomatoes using boiling water and then an ice bath. Boy did that ice bath feel good. It helped with the residual swelling that my hands were still experiencing.

From there it was just dicing of the peeled tomatoes and then adding in all the already prepped vegetables into the pot for their cook and then filling up the jars and water bath time. I was happy to see this project end. I ended up with some left over in the pot for this batch, so I let it cool in the fridge. The taste test of the left overs made me very happy and made Dan ask why I did not make more. This salsa was much improved over last year's salsa debacle. I cannot wait to pop open a jar of the peach to see how that one tastes. I need to remember to save some from now on to taste later. I guess my zeal to stop the burning of my hands and to finish off two canning projects in one day just took over. The pantry is starting to fill up to capacity, but there are more projects to show off and still finish. Check back tomorrow for tomatoes day two!

Tuesday, September 7, 2010

End of Apples

Last week was a super busy one, so busy in fact that I could not get to blogging about any of the canning I was doing. All was being done in short order and on a deadline since we were headed out of town for the Thresher's Reunion in Iowa on Labor Day weekend. One of the first things I finished off was the last of the box of apples! I am sure we will go apple picking at least once more this year before the winter, so this will not be the last of the apples for the year to be sure. This time I was experimenting in making my own pectin for use for next year. I got the idea from the fine folks over at Fig Jam and Lime Cordial. They have a really great tutorial that you can follow over there for making your own.

This project took the second bag of apple cuttings and scraps and put them to good use. This last set of scraps was not as fruitful as the other scraps with the added apples that I used for the apple syrup. I also squeezed the jelly bag this time in an attempt to get more juice out of the scraps to supplement the meager amount that had drained out using gravity alone. This made for a cloudy final product, but I think that I can drain off the pectin without adding the solids into the jam that I am making when I get around to using it.

Once the peels were juiced, it was into the fridge as I had run out of time that day. I could have drained off the solids here at this stage, but I was in a rush on that Friday to get it all finished up as I had a sick husband who came home early from work and a seemingly million item long list on my to do before Wednesday. Having a sick spouse at home was not going to make this to do list go by quicker. Needless to say, I cooked down the apple juice and then performed the pectin test outlined on the website. I got a good test, but I forgot to take a picture of the results. It was neat how the alcohol and juice just looked like liquid until I put the fork into it and scooped up. Then I got to see all the pectin globed up and solidified.

From there it was a quick trip into the two waiting jars and a 10 minute trip into the boiling water bath. They sealed down and then after sitting on the shelf for a day separated into the two layers you see here. I cannot wait to try them out. I think this year when I make my Pinot Pear jam I will use one of the jars instead of adding an apple like I did last year. From that experiment I am sure I will be able to tell if this will be strong enough for cherry next spring. If it turns out or not I will let you know. It is always good to hear about experiments and their end results. I hope it works well as this would be a great new way to use up something that otherwise would not have a use for me.