Life is peachy lately. Things seem to be humming along at a fast pace, and my days are filled with all sorts of urban homesteading activities. Aside from the canning, I now have the garden to tend. Let me tell you, I am loving getting my hands dirty and weeding away. I am also staring Christmas crafting in the face. I hope to get an early start this year... just like every year. For now, though, I am thoroughly busy with canning. As you can see by my lack of posting, most of my time has been occupied with things like canning. At the end of August, it was all about peaches. I bought a 25 pound box of peaches as well as a couple of other pounds along the way for canning projects. The first thing I do when I take home a large box of any produce is to sort it right away looking for any bruised fruit. The bruised fruit gets quarantined from the rest of the lot to ensure that no further spoilage is encouraged. This box had just enough fruit with bruises and spoilage for an early peach cobbler.

This time around, I decided to try out the recipe from
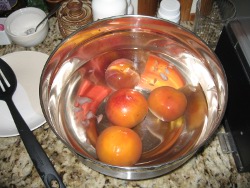
Cook's Illustrated. If you do not have a subscription to the website, I highly recommend it. The amount of recipes at your fingertips as well as knowledgeable equipment reviews are well worth the subscription fee in my opinion. I have to say that the recipe was rather fussy, but I felt like it was worth it, at least for the topping. One thing that I do recognize now is that I will no longer be using the boiling water technique in these pictures for peeling peaches ever again. I find that this method does not work very well for my favorite type of peach, the O'Henry. While this is a super freestone peach, it does not want to be skinned for some reason. I have, therefore, decided to only peel them from now on with my awesome
Messermeister serrated peeler. Yes the peeler is a bit expensive, but I have to say it is well worth the price. I will, however, miss the beautiful color that the boiling water turns when scalding the peaches. It is the most wonderful purple hue!

The other big advantage of the O'Henry peach is that it remains firm even through cooking. I like that the flesh does not all go to mush when processing it or turning it into a cobbler or pie. The slices still have integrity and a wonderful texture. Here is where the recipe gets a bit fussy, and while the step is totally necessary for a good result, I wished there was another way. The recipe has you macerate and strain off the extra juice from the peaches so that the cobbler does not become a soupy mess. The topping was another story. It was as simple as most recipes, and it resulted in a very tender biscuit due to the addition of yogurt.

I do want to make one more of these before all the fresh peaches have left the market. I especially love the extra crunch on the top of the biscuits that the sugar crusting creates. I do think that I will add a bit more cinnamon to it next time as I am a cinnamon fan. I highly recommend this recipe and have saved it as a favorite. I do have to say, though, that this did not dethrone the Dutch oven cobbler that we made when camping. That was so good, and I am not sure if it was the long hike before dinner, or that it was just really that good that made it taste so delicious. Perhaps some day I will make both at once and taste them side by side. Until then, try out this recipe and for an added touch of awesome, serve it hot with a little scoop of homemade vanilla ice cream!
 Life is peachy lately. Things seem to be humming along at a fast pace, and my days are filled with all sorts of urban homesteading activities. Aside from the canning, I now have the garden to tend. Let me tell you, I am loving getting my hands dirty and weeding away. I am also staring Christmas crafting in the face. I hope to get an early start this year... just like every year. For now, though, I am thoroughly busy with canning. As you can see by my lack of posting, most of my time has been occupied with things like canning. At the end of August, it was all about peaches. I bought a 25 pound box of peaches as well as a couple of other pounds along the way for canning projects. The first thing I do when I take home a large box of any produce is to sort it right away looking for any bruised fruit. The bruised fruit gets quarantined from the rest of the lot to ensure that no further spoilage is encouraged. This box had just enough fruit with bruises and spoilage for an early peach cobbler.
 The other big advantage of the O'Henry peach is that it remains firm even through cooking. I like that the flesh does not all go to mush when processing it or turning it into a cobbler or pie. The slices still have integrity and a wonderful texture. Here is where the recipe gets a bit fussy, and while the step is totally necessary for a good result, I wished there was another way. The recipe has you macerate and strain off the extra juice from the peaches so that the cobbler does not become a soupy mess. The topping was another story. It was as simple as most recipes, and it resulted in a very tender biscuit due to the addition of yogurt.