
Ingredients:
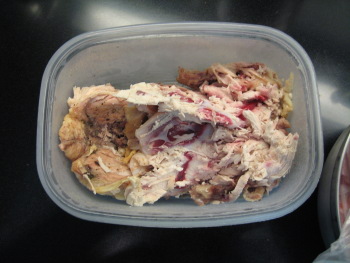
~ carcass of a chicken or turkey - some meat still attached is preferable to a cleanly picked one
~ three or four carrots
~ three stalks of celery
~ onion
~ bay leaves
~ parsley - fresh is best but dried works
~ thyme - fresh is best but dried works
~ rosemary - fresh is best but dried works
~ optional - oregano - fresh is best but dried works
~ pepper corns
~ salt
Equipment:
~ large stock pot
~ big wooden spoon
~ large colander
~ small mesh strainer
~ two big bowls
~ measuring cup
~ ladle
~ muffin tin
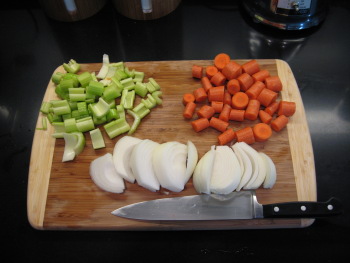
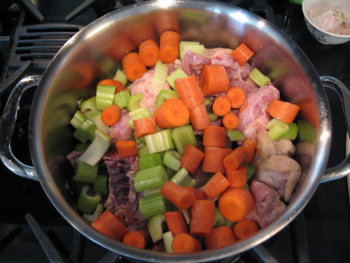
First wash all the vegetables and herbs that need to be washed. I do not peel my carrots for this, but you can if you would like. Chop the vegetables into large pieces. Do not make the vegetables too small as they will mush up too soon and cloud the stock too much.
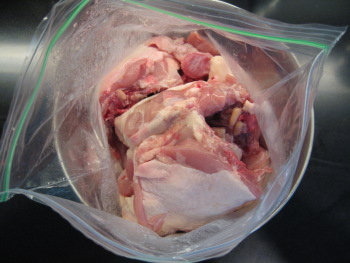
When I made stock this time, I had more than just the carcass of the bird from the night before. I happened to buy four chickens that shopping trip because they were on such a great sale. I broke the other chickens into parts for other meals, but I had backbones and internals left from the other chickens. If you only have a cooked carcass, please skip down to the picture of the cooking onions.
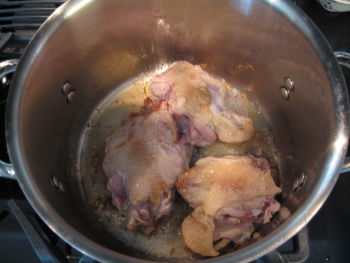
If this is the case for you, warm a little oil in your stock pot, remove the parts and pat dry. Place them skin side down in the pan and brown them up. This not only adds flavor to the pot but also will render out some of the extra fat from the backs. This is a traditionally fatty part of the chickens.

Once all the backs are browned, take them out of the pan. CAREFULLY drain out some of the chicken fat, leaving a little bit for starting on the onions. DO NOT drain the fat down your sink! If you did not have any raw pieces you can skip cooking the onions and just place them in the pot with everything else without any oils. Start the onions in the oil until they begin to sweat.

If you are just using a cooked carcass, throw everything into your pot. If you are with us from the cooking and rendering part, please throw all the other vegetables and cooked carcass into the pot. I also threw in the hearts and necks from the innards. I am not a big fan of using the livers however as I think it makes the stock look dark.
Fill the pot with as much water as is feasible. Remember that this is going to be simmering for a long time, and the water will evaporate out. You want to make this worth your time and not have to add more water during cooking.
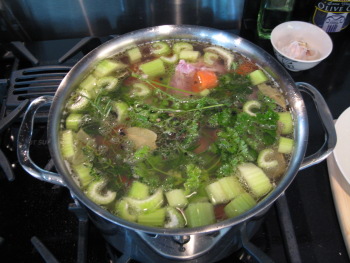
Add a half teaspoon of pepper corns and two teaspoons of salt. You can add less if you like. I usually just eyeball this and tend to err toward the side of less is best. You can always add more salt later. Bring the mixture up to a light simmer. It should be bubbling constantly but not violently. As it cooks for the first 30 minutes or so, a scum will start to form. Scrape off the foam from the top of the liquid and discard. If you do not do this, the end stock will be dark and cloudy.

When the stock evaporates off enough to feasibly put a lid on the pot, do so. There may be a dark ring left from the scum that you did not manage to get off of the top. Leave it on the side of the pan, do not scrape it in.

Continue simmering for a few hours with the lid on. I usually simmer mine for three or so hours stirring it around once in a while when I think of doing it. It will start to cook down quite a bit. The meat should be floating freely in the liquid and the vegetable should also become quite soft after a few hours. The stock should also be a nice yellow color. When it reaches this point, turn off the pot and let it cool slightly.

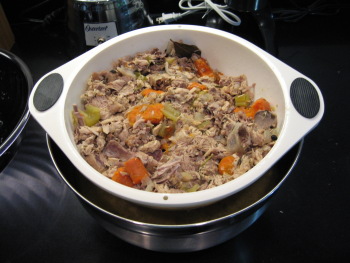
Once it is cool enough to easily handle, but not totally cold, strain out all the big pieces by pouring through the colander into one of the big bowls. I usually gently press on the contents of the colander to extract any trapped juices. Don't mash too hard or you will end up with vegetable pulp in the stock. Discard the contents of the colander.
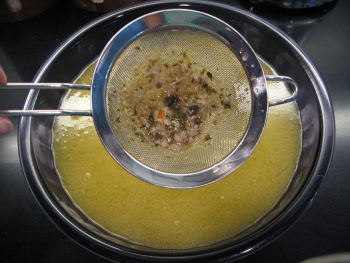
Next, pour the liquid from this bowl through the metal mesh strainer into the second clean bowl.

This should remove all the stems from the herbs, small bone chips, and other floating material. Discard. Some people do this through cheese cloth for a better filter.
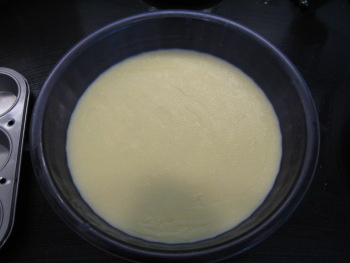
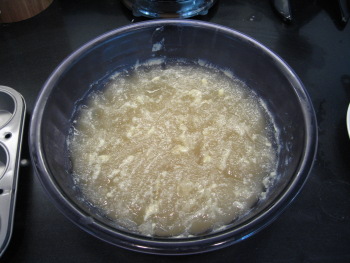
Place the stock into the refrigerator and cool the stock completely. The fat will rise to the top, and when it cools, it will form a filmy layer at the top of the bowl. The stock in the bottom will be very gelatinous like jello. This is just fine as the natural gelatin from the bones have been cooked into the water.
Scrape the top layer of fat off with a spoon and discard. Do not put this down the drain of your sink! It should come off easily without taking much of the stock from underneath.
If you are making soup, you can just reheat the stock and add any water you want if you would like a less thick stock. If you are planning to cook with the stock, I then take it and portion it out into a muffin tin and freeze it into "hockey pucks." Warm up the stock until it is mobile and liquid enough to pour it into a muffin pan.
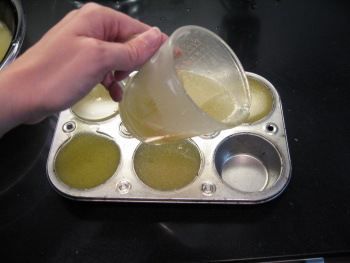
Most standard muffin pans will hold around a third of a cup of stock in each section. Once they are frozen solid, and they will still be a bit slimy and seem unfrozen, place the pan bottom into a little hot water to loosen up the pucks. Remove the pucks and place them into a freezer lock bag and place that back into the freezer. Whenever you need some chicken stock, you can just pull out as many third of a cup pucks as you need!
I hope you enjoyed this tutorial on stock making! Happy cooking!


4 comments:
Great tutorial! I never thought of freezing the stock in my muffin tin, but those look like they're the perfect size to use easily. Thanks for the tip!
I really do like having the convenience of the pucks. If I only need a tablespoon or something, it is easier than opening up a can and trying to keep it around.
Great Tutorial! I've made my own stock lots of times, but I learned some great new tips from you!
Thanks so much! I am glad to help out, and I always find it interesting to see how someone else does thing so I can pick up some new tricks.
Post a Comment